At Blizzard Data Recovery, we occasionally get emails, phone calls, and comments on blog posts asking about failed hard drive PCBs (printed circuit boards). One of the most common things we hear is the user swapped the PCB with a donor PCB from an exact same model and the drive still doesn’t work. The reason for this is that most modern hard disk drives store a small amount of information, like head adaptives, in an 8-pin serial flash memory chip. This chip is typically referred to in the industry as the ROM chip. The information stored in the ROM is specific to each hard drive, and that’s why a simple PCB swap does not restore your hard drive to working condition.
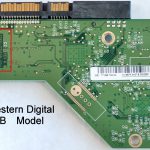
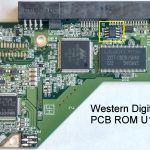
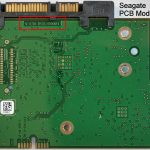
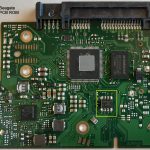
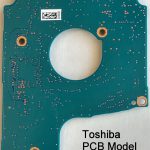
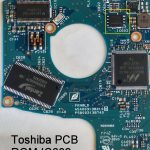
There are exceptions like some of the newer 2.5″ Western Digital SMR hard drives, but it’s still not as simple as using just any PCB. For Seagate, Toshiba, and Hitachi you will almost always need to move the original ROM to your donor board. It’s beyond the scope of this article to explain which WD models can work with a donor ROM and how to choose them, so going forward we will just assume you are going to move the ROM chip for every model. (See photos below)
The most common reason I have seen for a PCB failure for internal hard drives is an incorrect power supply connection. If you just bought a new modular power supply for your PC and blew up your hard drive circuit board, you may have tried to use the power cables from your old unit. Many modular power supplies don’t use a standard connection on the PSU end, so the cables are not compatible between different units, and it’s easy to accidentally damage your hardware by mixing cables.
For full size external hard drives, it’s not uncommon for someone to connect the wrong power supply. While many desktop model external drives use a 12V power supply, there are other external power supply outputs including 19V and others. If you connect one of these to a 12V device by mistake – poof! For portable drives that don’t have a standalone power supply, the USB connector is often torn loose from repeated plugging and unplugging.
If you are looking to avoid paying for professional data recovery service and you are sure the only problem is PCB failure, there are companies that specialize in selling donor boards and they typically include free ROM swaps with the purchase. This means you will need to send them your original PCB. There are a few things to consider before doing this:
- Choose a reputable company. They could lose your ROM if they do not have proper handling procedures in place similar to data recovery companies.
- Although it’s not as common on newer drives, the power issue that damaged your board could have damaged the preamp on the headstack assembly inside the HDD. If this is the case, your hard drive will still be unrecoverable with just a PCB and ROM swap.
WARNING: DIY work is risky. Without experience, practice, and the right equipment, you could destroy any chance of recovering your data. You have been warned, so now some basic DIY tips for hard drive ROM swaps. First you want to find a PCB with the same manufacturer part number (see photos below). Locate the ROM chip on the boards (see photos below). You will need a hot air rework station to remove the flash memory chips. DO NOT try to remove the chips with a soldering iron. DO NOT cook the chip or it’s game over. Get help from someone with experience removing SMD components. I have seen ruined PCBs and ROM chips with the legs torn off too many times from DIY projects gone wrong. Once you move the patient ROM chip to the donor PCB, you can mount the donor PCB on your hard drive. If all went well and the preamp is not blown, you should be able to recover your files.
WARNING: If you are using data recovery software to recover files, NEVER write or copy the files to the drive you are recovering from. You will end up with nothing but corrupt files.
If you are really concerned about recovering your data, we recommend that you skip the DIY experiment and send us your failed hard drive for recovery. We have flat-rate data recovery prices.
CLICK IMAGE TO ENLARGE
 |
 |
 |
 |
 |
 |